Welcome back to the Blue Fish ExpressionEngine Tutorial - Create a blog series. Part 4 is about templates. Before we begin, if you haven't read Part 1: Installation, you can do so here, Part 2: Channel Fields, Categories, Channels, you can do so here and Part 3: Publishing Entries, here.
We are now ready to setup the templates and make our blog ready for viewing.
This part of the series is going to be diving into some basics of ExpressionEngine Template creation, so having a basic understanding of how EE and its templating works please check out the Ellislab docs here.
Save Templates As Files
First thing we are going to do is setup our templates to be saved as files on our server. This allows for editing of the templates straight from the server rather than the ExpressionEngine Control Panel. This step is completely optional. This way is a personal preference for us at Blue Fish. There are two ways to set templates to save as files; one is via the Control Panel (see image below), two is through the config.php file.
via Control Panel
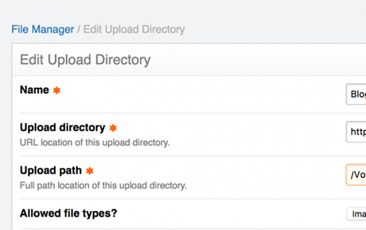
On the Global Template Preferences page you'll be presented with a number of preferences. At this time we are solely worried about the last two preferences, Save Templates as Files and Server path to site's templates. The Save Templates as Files is set to 'No' as default, lets change that to 'Yes'. Next is the Server path to site's templates preference, here we want to put the direct server path to where we want to store our templates. We like to keep ours in an templates directory under an assets directory, see below for example.
/var/www/public/assets/templates/via config.php file
Open the config.php file (located under sys > expressionengine > config > config.php) and directly underneath the settings for themes (we add in Part 1), add the following lines:
$config['save_tmpl_files'] = 'y';
$config['tmpl_file_basepath'] = $config['site_path'] . 'assets/templates/';
Save the file and you're set. You are now saving ExpressionEngine Templates as files.
The benefits to saving templates as files is being able to work from the server in your favorite editor, version control and it's just plain easier to maintain code
One last step before we begin creating our templates is in relation to our categories. We need to allow for the Category URL Titles in links. Two ways to do so. Via the CP or via the config file.
via Control Panel
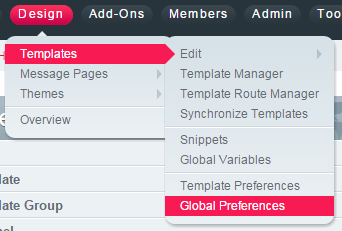
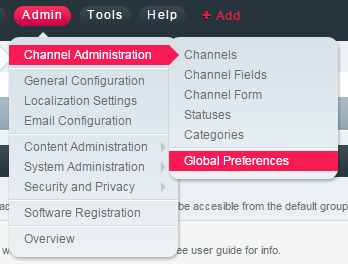
Click Admin in the main nav, hover over Channel Administration and click Global Preferences (see image below). Here you'll be presented with a few preferences regarding your channels. We want to allow for category url title in our links. By default this is set to No, we want to set it to Yes. Once you set that we are ready to go, click the submit button at the bottom.
via config.php file
We can also set this easily within our config file. To do this open up the config.php file and underneath our template as files settings we set above, add the following and save.
$config['use_category_name'] = 'y';We are now allowing for Category URL Titles in links. Let's move on to creating our templates now.
Template Creation
Now we have our templates saved as files, lets create our templates. Templates are arranged in Template Groups and within each group are individual templates. You can read more about ExpressionEngine's template structure here.
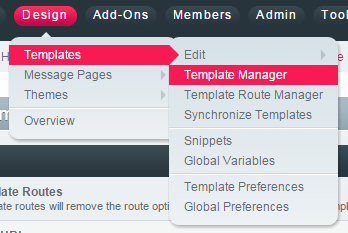
The first group we are going to create is our blog main page. So in the control panel go to the Template Manager (see image below).
You see there are no template groups and templates. To create our blog template group click the button title New Group. After doing so you'll be presented with 3 fields, the Group name which we will title blog, duplicate existing template group leave as is and make sure to check the box for making the index template in this group the blog's main page. Once that is complete hit the pink submit button and you'll be taken back to the template manager page.
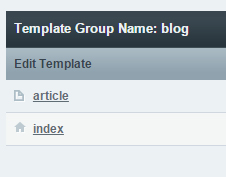
You should now see a new template called index is in the newly created group and we are now ready to actually start putting code into this template. To begin open the index template in your favorite editor or simply click the index template use the default EE editor.
Note since we started creating templates, a new directory titled default_site has been created in the templates folder. Under that folder you'll see your template groups which will contain your templates.
Template Code - Basic HTML
Lets start our template with you basic skeleton of html:
<!DOCTYPE html>
<!--[if gt IE 8]><!--> <html class="no-js" lang="en-us"> <!--<![endif]-->
<head>
 <meta charset="utf-8">
 <meta http-equiv="X-UA-Compatible" content="IE=edge,chrome=1">
 <meta name="viewport" content="width=device-width, minimum-scale=1.0">

 <link rel="stylesheet" href="{site_url}assets/css/default.css">

 <title>Blog/Article</title>
 <meta name="description" content="Sample blog article from the Blue Fish ExpressionEngine Tutorial - Create a Blog Series">

</head>

<body>
 <div class="grid-container">

 </div>
</body>
</html>
In the code above you'll see a css file, this is pulling in the styling from our in-house, responsive framework; but that is blog post for another day. We also have a default title tag and description meta tag in place. We address customizing those for individual blog entries shortly.
In version 2.8.0 of ExpressionExpression, shared layouts for templates was introduced. Most common use of this is to provide a skeleton structure to our site. We won't be using that for this basic tutorial but feel free to check out the previous link and learn more.
Once you have the above code within the template go ahead and save.
Lets create another template in the blog template group. You can either do it the server or within the EE control panel by clicking the Create a New Template button to the far right. Following the same procedure as before let's call this template article, leave the template type and for duplicate an exisiting template, select index under the blog group. Doing this will create the basic template as we did for the index template. If doing this on server name the file article.html and copy the code from the index template.
Now we have both our blog index or listing page and our individual blog article templates ready. Both are very bare bones and now need EE code to make them work. Now lets build out the actual blog, both the listing and individual article pages, starting with the index/listing page first.
Time for EE Code
Index/Listing Template
The index or listing page will be a list of the blog articles we published in Part 3. The following code below will create this list along with a category sidebar.
<div class="sidebar grid-20">
 <ul>
 {exp:channel:categories channel="blog" style="linear" show_empty="no"}
 <li><a href="{path='site'}">{category_name}</a></li>
 {/exp:channel:categories}
 </ul>
 </div>
 <div class="grid-80">
 {exp:channel:entries channel="blog" limit="4" paginate="bottom"}
 <div class="entry">
 <h2><a href="{url_title_path='site/article'}" title="{title}">{title}</a></h2>
 {exp:trunchtml chars="100" inline="..."}{cf_blog_content}{/exp:trunchtml}
 </div>
 {paginate}
 <p class="paginate">Page {current_page} of {total_pages} pages {pagination_links}</p>
 {/paginate}
 {/exp:channel:entries}
 </div>
First ExpressionEngine specific code you'll see is the Channel Categories tag:
{exp:channel:categories channel="blog" style="linear" show_empty="no"}A few things about this tag. It'll allow you show your channels categories in a list. The channel parameter is pulling from our blog channel, the style parameter is set to linear, this doesn't insert any html and last is the show_empty parameter. This parameter hides categories that don't have any entries within it.
Next tag is the Channel Entries tag. This is the primary tag to display content you've published. You'll the channel parameter, same as the Channel Categories tag, that will pull in entries from the blog channel. There is a limit parameter which limits how many entries are displayed and a paginate parameter which is set to bottom, this setting determines where the pagination code will appear within the channel entries code. We will cover pagination shortly.
Within the Channel Entries tag you see a number of other tags such as the url_title_path. This little variable inserts the url title to the specified template url, for example the code above will render the following:
<a href="https://domain.com/index.php/blog/article/2014-mlb-playoffs-set">2014 MLB Playoffs Set</a>Next tag you'll notice is for the TruncHTML add-on we installed in Part 1. This allows us to truncate the content you have with the {cf_blog_content} field.
Last is the pagination variable pair. This will create the pagination for our blog which will only appear if there are more entries than the limit we set in the Channel Entries tag. Read more about ExpressionEngines here.
After placing the above code into the index template, save.
Article Template
Let's move onto the article template. The code for this will be very much the same but with a few slight differences. Copy, paste and Save the following into the article template:
<div class="sidebar grid-20">
 <ul>
 {exp:channel:categories channel="blog" style="linear" show_empty="no"}
 <li><a href="{path='blog'}">{category_name}</a></li>
 {/exp:channel:categories}
 </ul>
 </div>
 <div class="grid-80">
 {exp:channel:entries channel="blog" url_title="{segment_3}"}
 <div class="entry">
 <h2>{title}</h2>
 {cf_blog_content}
 {if cf_blog_images != ""}
 <div class="gallery">
 <ul>
 {cf_blog_images}
 <li><a href="{image:url}" class="fancybox" data-fancybox-group="gallery"><img src="{image:url:small}" /></a></li>
 {/cf_blog_images}
 </ul>
 </div>
 {/if}
 </div>
 {/exp:channel:entries}
 </div>
Again the code is very similar except here the Channel Entries tag is set to pull in a single entry from the blog channel. This specification is done via the url_title parameter. In our setup the url title for our blog entries will be in segment 3. You can read more about ExpressionEngines URL segments here.
Other differences is the removal of the TruncHTML code, having just {cf_blog_content} will display the content in the field in its entirety. There is also the inclusion of the {cf_blog_images} custom field. This a Channel Images field so some of the variables are related to that add-on. We are putting each image within a li tag and making it dispaly the small or thumbnail size we set in part 2. We also wrap this field in a conditional. This gallery div will only appear on the page if the {cf_blog_images} field isn't empty. You can read more about ExpressionEngine Conditionals here. We will using conditionals again later on for this template.
Note that for our gallery we are also using a lightbox called Fancybox to display original sizes of the images. Additional javascript, css and images will accompany the template, all of which are included in Fancybox.
Checking out our progress
Now that we have both our templates created, let's check out the site. Head to your site; domain.com/blog, and you should see a list of 3 categories on the left, 4 blog entries and if more than 4 entries, pagination will appear at the bottom.
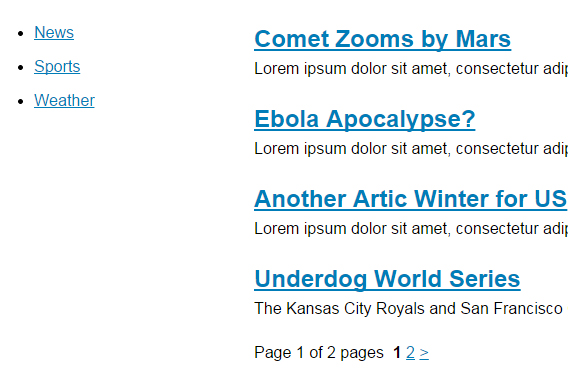
Clicking on the categories will then filter the list with entries belonging to that category. Clicking on the entry title will take us to the individual article page (our second template).
Final Step
A final step is to add some code to our article template to increase our SEO capabilities. The following code contains a couple of conditionals that will make use of the Title Tag and Meta Description custom fields. It also adds in some Open Graph metadata that some of the social networks use when pulling in information. So when you paste in a link on Facebook the Open Graph Metadata tells Facebook which images are available and what description should be used.
 {exp:channel:entries channel="blog" url_title="{segment_3}"}
 <meta property="og:image" content="{site_url}assets/images/logo.png">
 <meta property="og:title" content="{title} - Blue Fish Sample Site">
 <meta property="og:url" content="{url_title_path='blog/article'}">
 {if cf_title_tag == ""}
 <title>{exp:trunchtml chars="36" inline="..."}{title}{/exp:trunchtml} - Blue Fish Sample Site</title>
 {if:else}
 <title>{cf_title_tag}</title>
 {/if}
 {if cf_meta_description == ""}
 <meta name="description" content='{exp:trunchtml chars="36"}{title}{/exp:trunchtml} - Blue Fish Sample Site'>
 {if:else}
 <meta name="description" content="{cf_meta_description}">
 {/if}
 {/exp:channel:entries}
The code above you want to place in your article template before the closing </head> tag. All the metadata is enclosed within a Channel Entries tag. Here we use the url_title parameter to only pull in the content for the currently viewed individual article. For the Open Graph or og meta tags we use some basic info, the logo of our site, the title of the article followed by the name of the site and the url of the article. Next is a conditional for the cf_title_tag custom field. If field is empty display the entries default title otherwise display what is contained in the custom field. The second conditional is for the cf_meta_description custom field. Same method as the title tag above, if empty show default description otherwise show what is in the custom field.
This is just some extra steps we like to take on even the simplest of sites to increase our search optimization capabilities.
The Wrap Up
Following the instructions above will allow you to setup a basic Blog section for you website. This will also help you get started with ExpressionEngine and lead you in the right direction for building more parts to your site. If you have any questions or you're in need of ExpressionEngine help, hit us up.
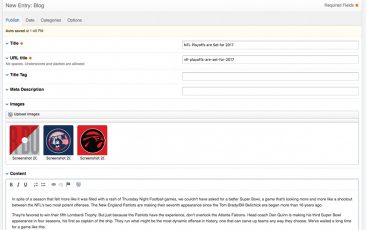
Please note that this is a simple example of how we setup blog/news sections on sites we develop. We are again using our own in-house, responsive framework for the html/css and the code samples provided throughout this tutorial are basic and can be changed accordingly to your own html/css framework or code. We are also not providing any real styling to this.