Update: This blog post was originally written in 2014 but we have updated it for ExpressionEngine 3.x as of 1/21/17. Hope you enjoy!
Welcome to Part 1 of How to Create a Blog using ExpressionEngine. We are going to walk you through the basics of how we set up a very simple blog section here at Blue Fish. First thing is installing ExpressionEngine on your server. We will be using ExpressionEngine 3.5 for this install. We like to stay a version or two behind the current versions to allow any bugs to be squashed and add-ons are updated.
Before we get started, make sure your web host meet all the System Requirements for running ExpressionEngine.
Step 1 - Installing ExpressionEngine
To install ExpressionEngine you'll want to follow the instructions provided by Ellislab here.
Step 2 - Extra security
Making EE a little extra secure is something we like to do for all the sites we develop. No site can be 100% secure but these few techniques provide some extra protection for your site. Out of the box ExpressionEngine is solid and doesn't have any major security flaws. But with the extensibility of EE, introducing a flaw during custom modifications can happen.
Please makes sure to check permissions on the folders and files listed in the Ellislab instructions after you complete the following steps.
First is move the 'system' folder above the web root.
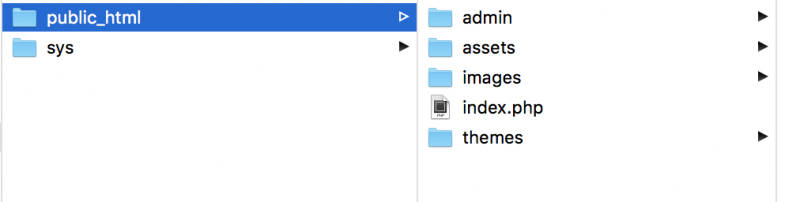
Here you see the web root is public_html. This means anything in the public_html directory can be seen by the public via a web browser. So pushing the 'system' folder (renamed here to sys) above web root, it is completely inaccessible to the internet.
After moving the 'system' folder we like to rename it. You can name it anything you like, for this example we are naming it 'sys'.
Once you've moved the 'system' folder or 'sys' as we renamed it, you'll want to make 2 slight changes in two files, the admin.php and index.php. Opening both of those up you'll see '$system_path = './system';'. This is targeting the old system folder before we moved it. Now that we have you'll want to change that to "$system_path = '../sys';". Notice the extra period and again the renamed folder. This allows EE to access the system folder but keeps the folder from being accessed via web browser.
$system_path = '../sys';
Next step we like to take is creating an 'admin' folder, placing the admin.php file in the folder and renaming it 'index.php'. This provides us with a cleaner, more user-friendly url for our clients. Once you move that file, open it once again and look for "$system_path = '../sys';" and change it to "$system_path = '../../sys';". This will allow the control panel to go up 2 folders to the 'sys' folder.
$system_path = '../../sys';
Step 3 - Installing Add-ons
Now that we have ExpressionEngine installed and ready to go we can now install a few add-ons. These add-ons are a part of our default EE installs. The following are the add-ons we are going to install.
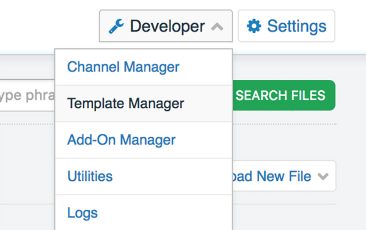
Installing add-ons is pretty easy, first you'll want to follow the uploading instructions for each of the add-ons; Channel Images, and WYGWAM; then log into your newly installed EE site. Once logged in click on Developer and click on Add-On Manager in the dropdown. Click install for Channel Images and WYGWAM to the right and they will install automatically.
Step 4 - Creating Upload Directory
After installing EE and the add-ons listed above, we want to go ahead and create a file directory for our blog. This is where any images we upload when posting to the blog will go. We also want to do this now instead of during our Channel set up so we don't have to double back to create it when we are creating any channel fields.
To create this directory, click Files.
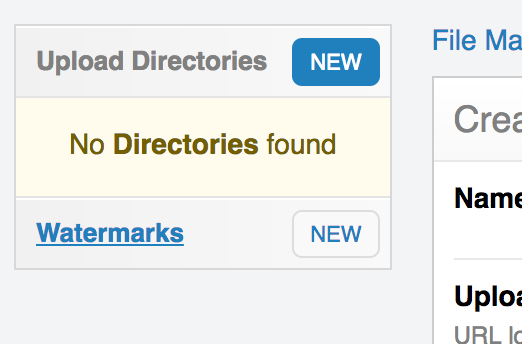
On the File Manager page you'll notice there aren't any upload destinations created. To create one click the New button.
Make sure you have created this directory on your server (or localhost). We created our upload directory in 'assets/uploads'. Once you've done that you will need to put in a few items so that this upload destination points to that directory on your server. Name the upload directory Blog, make sure to fill in the server path and URL. For this directory we are only uploading images so the 'Allowed File Types' stays as is as well as the rest of the settings. Click the 'Save Upload Directory' button at the bottom and the upload destination has been created.

The Wrap Up
By following the 4 steps above you'll be well on your way to creating a blog section using ExpressionEngine. Be sure to check back next week as Part 2 of How to Create a Blog using ExpressionEngine will cover Channel Fields, Categories and Channels.
As always if you're in need of ExpressionEngine help, hit us up.